
iStripper - skins
Skins installation
1. Introduction
In this document I would to describe the method for installing skins in iStripper application. This document is not dedicated to creating skins.
Skins are the new feature that comes with iStripper 1.2.120 (beta). Skins will not work in older version of iStripper. If you have older version installed on your computer, you should update your copy of iStripper now. The actual version, while this document was created, was 1.2.174.
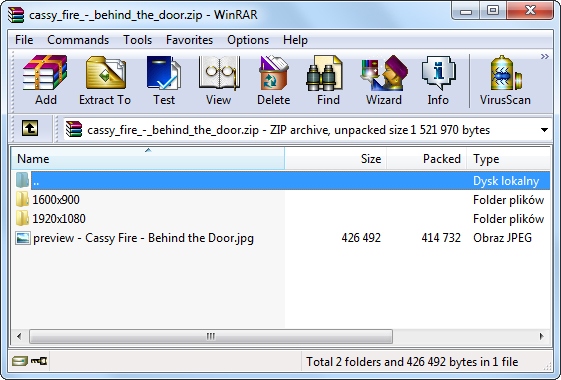
Skins are available for download from this site as ZIP archives. Content of single skin will look like on this picture:

The first important thing to look out for is the folder containing the model name and the title of the skin in its name. This folder with its whole content is the actual skin. The folder name is also the name of the skin under which it appears in iStripper.
Within this folder you can find few files of different type. Their description goes beyond the subject of this manual. In short, their editing is not recommended unless you know what you are doing.
Some skins have been prepared in several versions for different monitor sizes. You can find ZIP files whose contents look like this:
Folder names can tell you for what resolution the skin has been prepared. In such cases, select a resolution equal to or less than the resolution of your monitor.
2. Target path
Installing skins is nothing more than copying the contents of the ZIP archive to the appropriate directory (target path). The default path is:
C:\Users\username\AppData\Local\vghd\data\skins\iStripper
However, this path may be different, depending on which directory you chose during the software installation. If you don't know this path, you can use Windows Search. You can also locate it in the system registry. How to do it?
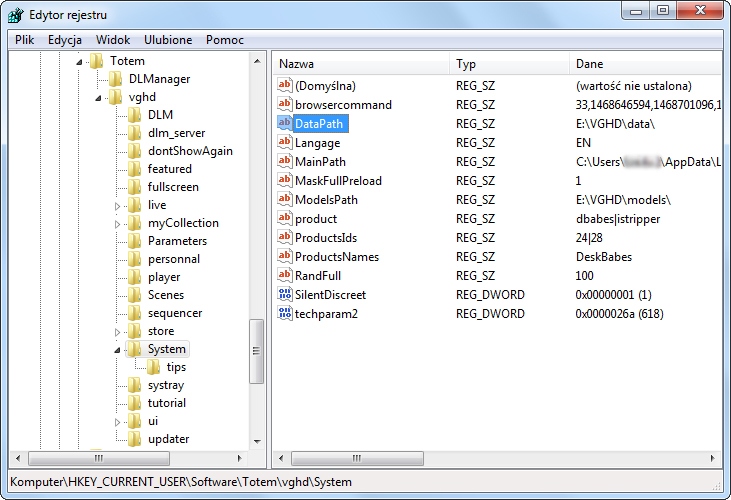
Click Start, and in the search bar type "regedit" (without the quotes). The system should find regedit.exe. This is a Registry Editor - click it to open it. To open the Registry Editor, you can also use the [Windows + R] shortcut, type "regedit" (without the quotes) and click OK. In the Registry Editor opened, you will notice a tree on the left side of the window. Go to the key:
HKEY_CURRENT_USER\Software\Totem\vghd\System
In the right pane, locate the variable named DataPath. Its value will indicate the exact path to the data folder. That is exactly what you need. Now that you know the path to the data folder, you can close Registry Editor.
3. Installation
1. Before you install a new skin, close iStripper.
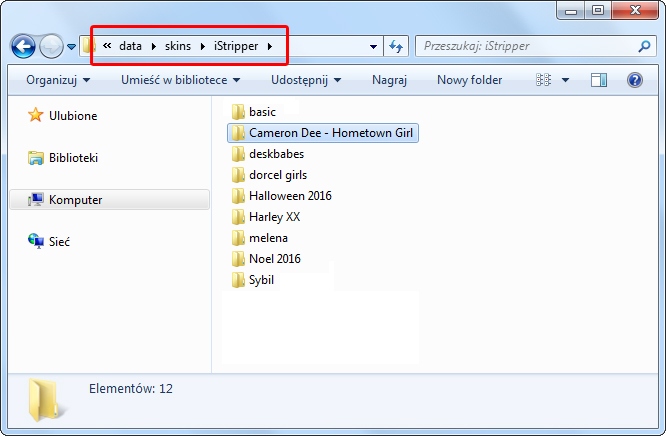
2. Open the data folder. Inside there are many folders named like "e0123" or so, there is also a skins folder - find and open it, then open the iStripper folder.
3. Extract content of ZIP archive to /data/skins/iStripper
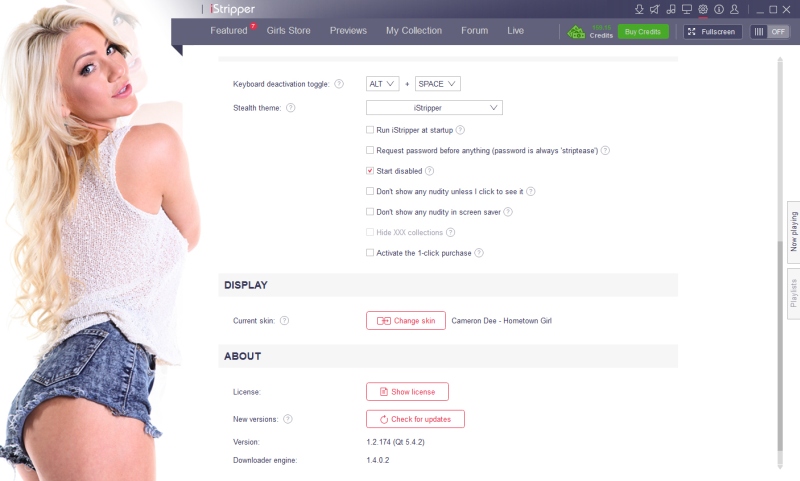
4. Restart iStripper. Go to the Settings tab and scroll to the Display section. Click the Change skin button. Among all available skins you should find your new, just-installed skin.
5. After changing the skin, iStripper may not auto-refresh all items. For sure, shut down and run iStripper again. After restarting, all elements of the new skin will be loaded correctly.
That's it. The other skins are installed in the same way.