iStripper - Custom replacement cards installation
Custom replacement cards installation
1. Introduction
This document describes the method for installing custom replacement cards in iStripper application. This document is not dedicated to creating such cards.
Custom replacement cards are small jpg images that represent each separate show. They contain the image of the model, as well as several information, including: card number, name of the model and title of the show.
Custom cards are available for download from this site as ZIP archives. Content of single archive will look like on this picture:

Cards have been divided according to the collection. Each collection is represented by a single letter. In this example, five collections are available, including:
- a - iStripper Classic collection (formerly VirtuaGirl HD),
- b - VirtuaGuy HD collection,
- c - iStripper XXX Classic collection (formerly DeskBabes),
- e - iStripper collection,
- f - iStripper XXX collection.
This method allows you to easily find cards from the collection you are interested in.
Inside each folder there are subfolders whose names correspond to individual cards. An example of the folder contents for the "e" collection (iStripper) is shown in the image below.
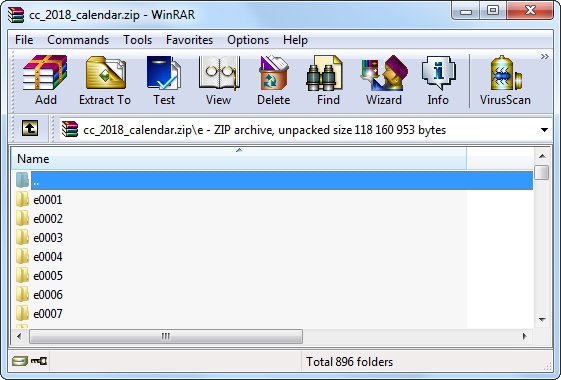
The picture shows only seven folders, in fact there are several hundred (896 folders in this example). Each of them contains a single jpg file, which is the actual replacement card.
Editing the names of both the folders themselves and jpg files is not recommended, as it may cause to malfunction after they have been installed.
Additionally, the _copy_custom_cards.bat file can be located inside the downloaded ZIP archive. It is not required for card installation. This file can, however, be useful if you want to easily browse all the cards contained in the archive. The bat file copies jpg images from their subfolders to the current folder. The current folder is the one in which the bat file is located. To copy jpg images to the current folder, run the bat file, confirm the operation with the Y key and press Enter.
2. Automatic installation (Windows)
You can use the install.bat script to install replacement cards. The file is included in the downloaded ZIP archive. To perform the installation, extract the contents of the downloaded ZIP archive to any folder on your computer, and then run the install.bat file. You will see the window shown in the image below:
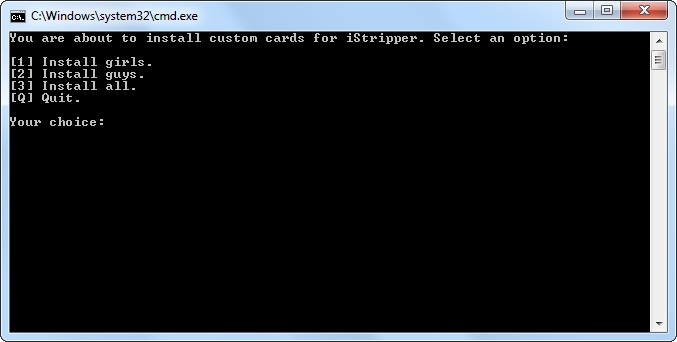
Choose one of the available options by pressing the appropriate key on the keyboard of your computer. The following options are available:
- 1 - Install girls - installs cards related to the a, c, e and f collections (VirtuaGirl HD, DeskBabes, iStripper and iStripper XXX),
- 2 - Install guys - installs cards related to the b collection (VirtuaGuy HD),
- 3 - Install all - installs all available cards.
- Q - quit - close the script (without installation).
After pressing the key, the installation process will be started immediately. The completion of the installation will be announced with the following message: "Done. Press any key to exit". Close the installer by pressing any key on the keyboard.
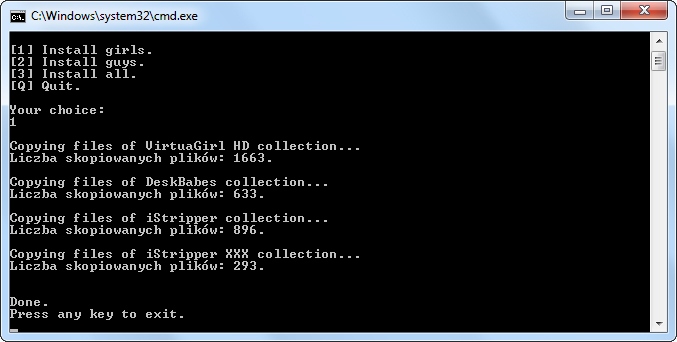
If iStripper was previously running, close it and start it again to see the result.
To uninstall the replacement cards, run the uninstall.bat. The uninstallation process is similar to the installation process.
If the automatic installer does not work on your system, it will be necessary to install the cards manually. To manually install the cards, go to the next section of this manual.
3. Target path
Installing custom cards is nothing more than copying the contents of the ZIP archive to the appropriate directory (target path). The default path is:
C:\Users\username\AppData\Local\vghd\data
However, this path may be different, depending on which directory you chose during the software installation. If you don't know this path, you can use Windows Search. You can also locate it in the system registry. How to do it?
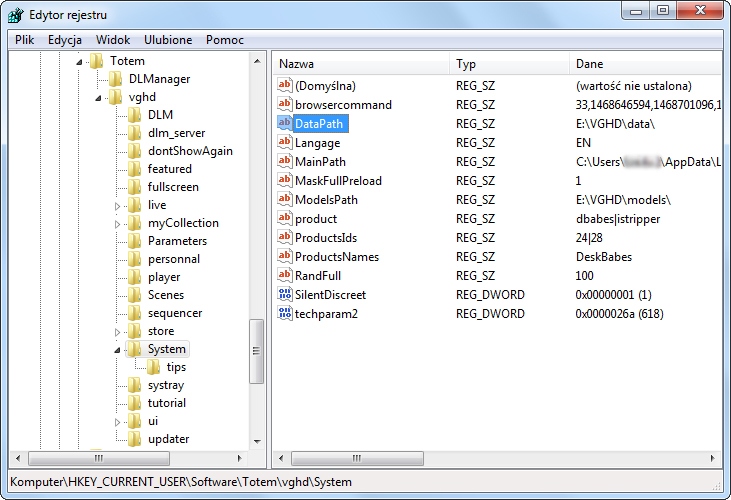
Click Start, and in the search bar type "regedit" (without the quotes). The system should find regedit.exe. This is a Registry Editor - click it to open it. To open the Registry Editor, you can also use the [Windows + R] shortcut, type "regedit" (without the quotes) and click OK. In the Registry Editor opened, you will notice a tree on the left side of the window. Go to the key:
HKEY_CURRENT_USER\Software\Totem\vghd\System
In the right pane, locate the variable named DataPath. Its value will indicate the exact path to the data folder. That is exactly what you need. Now that you know the path to the data folder, you can close Registry Editor.
4. Manual installation
1. Before you install a new set of custom cards, close iStripper.
2. Extract the contents of the downloaded archive to any directory on your computer's hard drive. You can create a new temporary directory for this purpose, which you will delete after installation.
3. Go to the subfolder containing the cards of the collection you are interested in, for example, if the collection you are interested in is the iStripper collection, go to the subfolder named e. Select all the folders inside ([Ctrl+A] shortcut) and cut them ([Ctrl+X] shortcut).
4. Open the data folder that you have previously located.
5. Paste the subfolders just cut out into it. To paste, you can use the [Ctrl+V] shortcut.
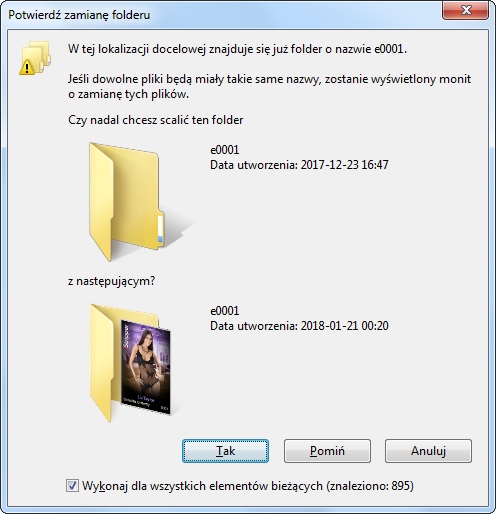
6. Windows will display the Confirm Folder Replace window. When you will see the question "Do you still want to merge this folder with this one?" answer Yes. Check the "Do this for all current items" option so that the system doesn't ask again.
7. If you have previously used a different set of custom replacement cards, system will probably ask you if you want to overwrite existing files. If this happens, select the Copy and Replace option.
8. Perform steps 3-7 for the remaining collections.
9. Delete the temporary folder you previously created for the ZIP archive.
10. Run iStripper.

From now on all cards in your collection and in the store will be represented by new images.
